Advanced Features
This section is dedicated to View Editor Advanced Features, including visualizations and custom tags.
Visualizations
For TomSawyer diagrams or plots, please see the DocGen Manual.
Temporal Diff Tag
Compares an element at two different refs/commits and generates a diff highlighting what has been added and deleted. You can use the element history view in the right pane to access element level changes.
Example Code
Group Documents
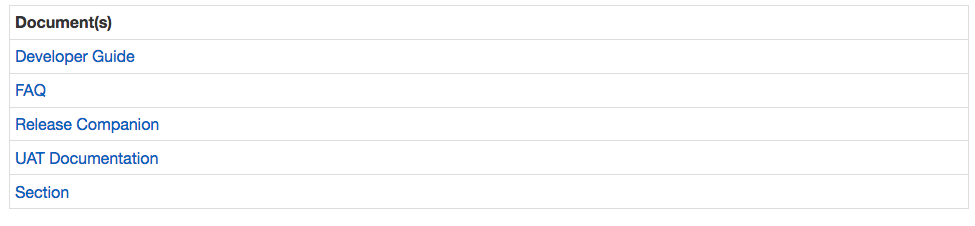
The Group Documents directive generates a table used to reference all the document links within a site. This can be placed on the cover page of a group.
Here is an example of how you would define the directive to load the appropriate HTML.
Here is an example of document links for CAE View Editor site.
Autosave to the browser’s localStorage
This feature automatically stores unsaved contents from any of the CKEditors to the browser’s localStorage except for the editor on the Comment’s Modal, Proposal’s Modal, Cross Reference Modal and Workspace’s description. The contents will be auto saved at a configurable interval of 5 seconds and with the users’ consent reloaded automatically to the editors which they belong.
These auto saved contents are automatically deleted when either one of the following conditions is met:
Users press on one of the following buttons on the editor itself:
save
save and continue
cancel: when the dialog shows up and users confirm the cancellation
delete: when the dialog shows up and users confirm the deletion
Users press on one of the following buttons on the toolbar located on the right side of the app’s layout
save
save and continue
cancel: when the dialog shows up and users confirm the cancellation
saveAll: This button is a little bit special because it shows up in two different situations.
Shows up after users click on the “Edit Element” button on the toolbar located on the right side of the app’s layout. In this case, it will delete all the new auto saved contents related to the specific element the user is editing.
Shows up after a user modifies one or more elements on the page. In this case, it will delete all the new auto saved contents corresponding to all these elements.
When saving to a full capacity browser’s localStorage, all expired auto saved contents will be automatically deleted to make room for new contents.
Table Sorting and Filtering
There are three main functionalities:
Sorting a column
Table-Wide filtering
Column(s)-Wide filtering
Sorting and Column(s)-Wide Filtering features are enabled only for the top level table’s header columns. Please read further for special rules of these features regarding different types of content such as an image, an SVG, and a nested table.
Sorting Feature works on a single column at a time (no multi-columns sorting) with the following capabilities and rules:
Sorting is done alphabetically in an ascending or descending order
Content such as a nested table, an image and a SVG are not considered sortable and as a result, when sorting them among other text-only content, they will either be pushed to the bottom or the top based on the sorting order
To restore the original content’s order, click the “Reset Sort” button which appears when the order of the content is changed
Table-Wide filtering works by comparing the user’s specified filter term against the content of every row on the table with the following rules:
Images and SVG are not filterable
Filter term can either be an exact match or just a partial match of the content in the table
Column(s)-Wide Filtering allows filtering on a column or multiple columns in a sense that additional filtering can be performed further on top of the previously filtered results. Column(s)-Wide Filtering works the same way as Table-Wide Filtering regarding the types of content that can be filtered. Table-Wide and Column(s)-Wide Filtering don’t work on top of each other; when Column(s)-Wide Filtering already filters some results, Table-Wide Filtering will perform the filtering on the original content instead of the filtered results and vice versa. To enable Table-Wide and Column(s)-Wide Filtering features, click the “Filter table” button.
Configure Org Home Link
The Org name in the upper left can be configured to go to a specific url - to change it, issue this POST request to
To see current list of orgs, make a GET request to /alfresco/service/orgs
Configure Auto-numbering
By default figure and table auto-numbering are sequential. To change the numbering scheme, fill in the “figureContextDepth” and “figureSeparator” tag values on the Document stereotype in the model. figureContextDepth controls how many levels of context to show, figureSeparator is the separator between context and number.
Ex. 2 and - results in numbering that looks like 1.3-2 or 1.0-3
To suppress MD generated table or figure captions:
In docgen or userscripts, use the “excludeFromList” option to prevent a generated table or figure from displaying captions and exclude from list of tables and figures
PDF Customization
When exporting to pdf, the user can choose to provide their own css stylesheet. If this Advanced Options is used, the header and footer options from the Basic Options tab are ignored.
VE uses PrinceXML for styling PDFs. See Prince User Guide for all options.
By default, this is the CSS that’s used:
VE css classes
Available Classes
selector |
description |
|---|---|
.ve- cover-page |
container of the document cover page |
.chapter |
top level views (1, 2, 3, etc) |
.fir st-chapter |
first view |
.h1, .h2, .h3, etc |
corresponds to view or section titles at that level (title of view/section 1.2.3 would have class of .h3) |
.v iew-title, .sec tion-title |
the h1 title of a view or section |
.toc |
table of contents |
.tof |
list of figures, list of equations |
.tot |
list of tables |
.landscape |
landscape elements |
Example customizations
Change font size of titles based on level:
Starting page number on a certain page:
Using Roman numerals:
Advanced Cf
A cross reference can also specify another branch or time, ex.
<mms-cf mms-element-id=”elementId” mms-ref-id=”refid” mms-commit-id=”commit id” mms-project-id=”projectid” mms-cf-type=”name”></mms-cf>
refId, commitId, and projectId are optional and not included when adding cf via the UI. If they’re not included, they inherit the parent element’s, then ‘master’ for refId and ‘latest’ for commitId.
The attributes can be added manually via the text editor’s html editing tab if desired.
View Editor User Guide: 10 Run XLR
There’s a custom tag one can add to trigger an XLR release from any view.
To add the button, go into source mode of a text field and add the following:
<run-xlr template-id=”{templateId}” xlr-task-name=”Run XLR” xlr-release-name=”release name”>ignore</run-xlr>
Where the template-id is the string in the url for the xlr design template, with ‘/’ instead of ‘-‘.
Ex, if the url in xlr for your template is this:
the template-id would be
Folder898892011/Folder521642095/Folder47c1077774ae4cf69d499daa260b3904/Release619d801931384eae9a25ba8baff2
The xlr-task-name attribute is just the name of the button that will display.
The xlr-release-name is what the release will be called in xlr.
Once a user clicks the button, a login popup will appear, this is for logging into xlrelease using jpl username/pass and permission to create a release based on the template is controlled by xlr.
Currently will send the following as variables in the release:
“contentEditor”: jpl username
“editorEmail”: jpl email